Thursday, March 31, 2011

Strawberries

Strawberry plants have shallow root systems allowing you to
plant several plants in this Strawberry Pot
  Strawberries are a very easy to grow fruit that will produce year after year. You can plant thing in beds or rows but they grow easily in containers and "Strawberry Pots" like the one I chose to use can hold several plants.

 For your strawberry pot you'll need the following things.    

  • Terracotta Strawberry Pot
  • Strawberry Plants
  • 1" Diameter PVC long enough to reach from the rim of the pot to the lower most pocket (the holes on the side of the pot)
  • Potting Mix
  • Plant Food (optional)

  A section of 1" PVC with holes drilled along the side and just long enough to reach from the rim of the pot past the lower most "pocket" will allow the water to reach all levels of your pot more easily.

  Add soil up to the lower most "pocket". Place your first plants in the bottom pockets and then place the PVC section just off-center of the drain hole.


  Continue adding your soil mix and plants. When you reach the top you can place a couple of plants in the center too. Water well and place in a sunny spot and you'll have sweet ripe strawberries in little over a month.

Wednesday, March 30, 2011

Rainy Day Gardening


Just because it's pouring rain all day doesn't mean you can't make progress on your garden. It's the perfect time to peruse the seed catalogs, revise your plans for current beds , make plans for you next,  catch up on a little light reading in your gardening books or favorite websites or even clean and sharpen your garden tools. I took the opportunity to order some seeds from Burpee.com for my two new beds. A few of which are great looking heirlooms varieties of French origin, the descriptions of which sound like they will be perfect for my kitchen table.

They are:

Tuesday, March 29, 2011

How to make a simple rain gauge


  There's no need to purchase a rain gauge if you looking for pure functionality. Take any clear container with a flat bottom. The mouth of the container should be the same size as the walls. The pasta sauce jar I used has just a slightly smaller mouth than the sides but it's close enough to give me a relatively good gauge of how much rainfall occurred.

  Take a ruler or tape measure and place inside the jar against the bottom and mark off your measurements. Place it in your garden or yard away from building and with nothing hanging overhead other than clear sky.

Laying out new beds

 While my back-door "Kitchen Garden" is a great start at growing my own produce I want to start up another raised bed to grow larger variety of vegetables. I think I've chosen a great spot next to the main garden that my parents tend in a more traditional "row crop" fashion.

The Steps to starting a new bed:
  1. Choose location based on what you intend to grow.
  2. Plan the site.
  3. Prepare the existing soil.
  4. Build the sides of the bed (if using supports)
  5. Raise the bed by adding soil and compost.
  6. Set the plants.
 A pole barn extension to an existing storage building cut off this section of the garden so it'll makes a perfect nook to place a raised bed. I measured the area and decided my best option is to build 2-4'x8' beds. The long sides will run east-west and one bed will be set north of the other. While a fig tree shades the eastern side both beds will still be get a full day's worth of sunlight for most of the year.

  So after deciding on the location and size of beds I like to go ahead and make a plan of what I intend to grow. Now this won't be written in stone and subject to change after I make a trip to seed store but planning now will give me a better idea of the number of plants I can manage in this area. This gives me the opportunity to make changes to my layout before I break ground. I just sketch out the shape of my bed using a simple scale of 1"=1'. Then plot the location of plants according to how far apart they need to be planted.

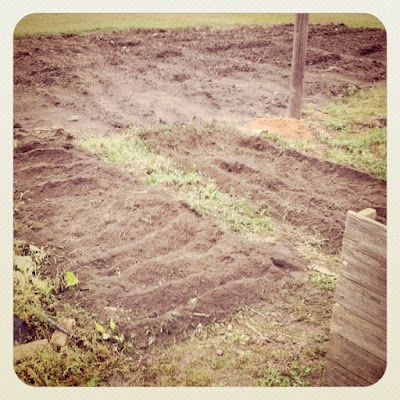
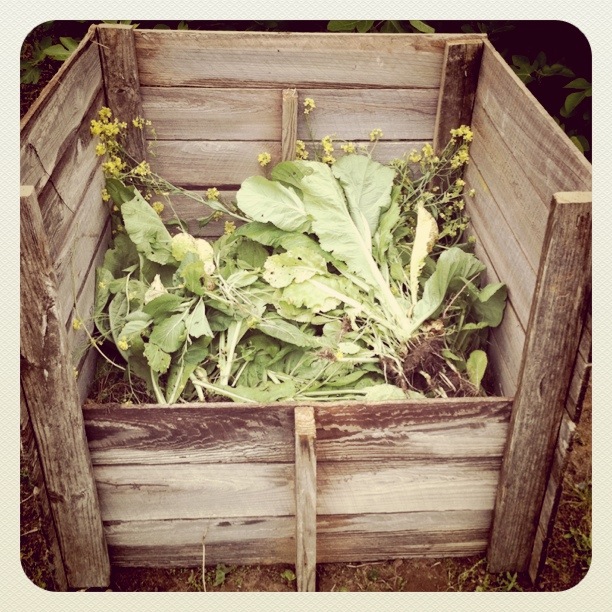
  It may still not look like much but the two 4'x8' sections have been tilled to a depth of about 8". This is one of the few times where it's OK to till because the soil had been heavily compacted by foot and machine traffic over the area. Also a rich layer of soil will be built up over this patch to form the actual raised portion of the bed. I'll be using reclaimed fenced paneling I have on hand to make the sides of the bed. This is the same stuff I used for my compost bin. You don't have to use side supports for your raised bed as you can just pile on the soil and compost to raise the area you're using. I just prefer to have a neat edge to hold everything in place. After a season or two when the bed is well established well defined I may remove the supports and use them on new beds I start.

Here are the two beds completed, filled with some good composted soils from a local farm and set with the first plantings.

I'm really going to pack the plants in close in these beds to see how intensively I can grow in this rich loose soil. I'll also be staggering my planting times to try and take advantage of our long growing season here in the south to harvest some of my staple produce items all season long.

Monday, March 28, 2011

The Compost Bin

Finished compost bin made from recycled fencing.
 A few weeks ago my Dad came back from visiting my Grandmother and brought with him a trailer load of old fence panels he'd taken down at her place. They've been stacked up in my back yard since then and I've been thinking of projects to use these for. I'd already made a birdhouse, with my girlfriend, that I was rather proud of because I managed to use every inch of a single plank to make it. Now I wanted to make something bigger and I decided a sorely needed compost bin was in order. Using two panels I made 3 3'x3' sides. It was a simple matter of just sawing the panels to the right size. I nailed these together used some of the leftover boards to make the half high front piece. This piece isn't nailed in but rather just slides into place. That will make it easy to remove when I need to turn the pile and later when I'm ready to shovel out my black gold. I can also slide another half piece on top if and when the pile reaches that high.
These greens are going to be a greater starter
for the pile.
To get the pile started I dug out a bag of carrots and celery that had been sitting in my fridge for way too long and two lonely lemons that never made it into a cocktail. That was a meager start but I also happen to have a row of greens that needed to come up and now can have a second life quietly composting away in the corner of the garden.

So how does a compost pile work? What goes into it? And most importantly, why go to the trouble of having one?

First of all a compost pile is nothing more than the decomposed remains of organic material that has been broken down, by heat, moisture and organisms back into a nutrient rich soil.It completes a cycle in which nutrients from the soil are taken up by the growing plant and then released back when it dies and decomposes. Gardeners can take advantage of this natural cycle by constructing and maintaining a compost bin and working the resulting compost back into their beds and containers.

Growing Rosemary

Rosemary Bush
Rosemary is a hardy, easy to grow evergreen that everyone who cooks should have in there garden or in a container. Not only is Rosemary great to cook with but you can also use them as a fragrant ornamental shrub or even a hedge. Rosemary is drought tolerant and very low maintenance.

Location: Rosemary does great in full sun. Good drainage is a must as the plant does not do well in wet soggy soils.

Harvesting: Just snip the stems back with a pair of sharp scissors when needed. If you also using as a ornamental shrub, prune back into the shape you want and store or use the trimmings.

Storage: Dry and remove the leaves from the stem. Store in air tight containers.


More info on growing Rosemary at About.com

Growing Chives

Chives after a harvest
The subtle onioney aroma and taste of fresh chives is one of my favorite things. I'll even chew on a piece while I'm harvesting it. Cheesey potato soup just wouldn't be the same without a generous garnishing of chives on top. Or, dress up a plain omelet with a few a pinch or two for a tastier breakfast.

Chives are super easy to grow and harvesting is as simple as giving them it quick haircut with the scissors.


More info on growing Chives at About.com

Growing Oregano

Oregano, a favorite, best known as staple in Italian dishes (Greek Oregano) is also an important herb in many southwestern and Mexican dishes (Mexican Oregano). I recommend having both because...well why not?

Location: Oregano thrives in full sun and in well drained soil. Like Thyme, Sage and Tarragon; Oregano does well in a "poorer" soil mix. So avoid the richer, more fertile soil mixes and avoid the fertilizer.

Care: Cutting back sprigs will keep the plant bushier and fuller. Trim sprigs when they 4-6".

Harvest: Trim sprigs when needed. Flavor (from the essential oils in the plant) decrease during and after flowering so harvest before use what you need, dry and store the rest.


More info on growing Oregano at About.com

Growing Basil

Basil is incredibly easy herb to grow that will add great flavor to a variety of dishes.

Young Sweet Basil Plant

Location: A sunny well drained area. Grows well in containers. Makes perfect companion to tomato plants.

Growing: Start in greenhouse or plant outdoors after last frost. When flowers begin to form, remove to promote more leaf growth. Pinch tips back for a bushier plant.

Harvesting: Pinch off individual leaves as needed or cut off tops to encourage bushier growth.

Storage: As with most herbs use as soon after harvesting as possible for best flavor. Basil stores best when frozen.

More info on growing Basil at About.com

Sunday, March 27, 2011

My "Kitchen Garden"

My "Kitchen Garden" of Onions, 
Tomatoes, String Beans, Peppers and Herbs
I'm doing more this year to grow more of my own food. While I don't have the resources (i.e. time and money) to grow all of my food every little bit helps and will add great fresh flavor to my meals.

I should have string beans by the end of April and Tomatoes and Peppers by the end of May.